Adventures in Woodworking…FRC Style
Today was the 2nd day of the 2012 build season and today was a woodworking frenzy. Before I designed toys for kids, I designed toys for adults also known as power tools. During that time I was fortunate to build up a nice home and portable wood shop. Since I love building and love power tools, building the field is something I really enjoy.
Over the past few years the drawing package for the field has gotten much better and the addition of the low cost team field really helps to get things going quickly. Every year I will never follow the plans exactly mainly because there is normally a better way to do things. My only isse with these plans is that it is obvious that nobody at FIRST who reviews these knows how to build with wood in the practical sense and there are always organization problems with the packet. I don’t mean to gripe because without these plans many teams would not have anything to practice with, but it is always enjoyable to poke some fun at small things.
Here are a few Gems from this year.
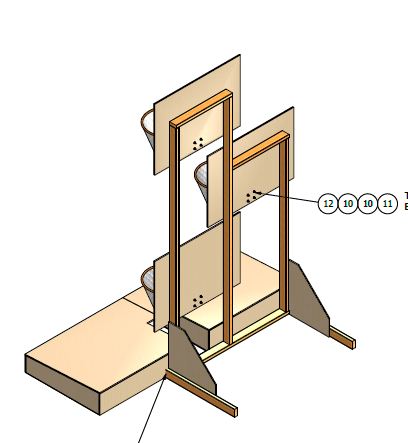
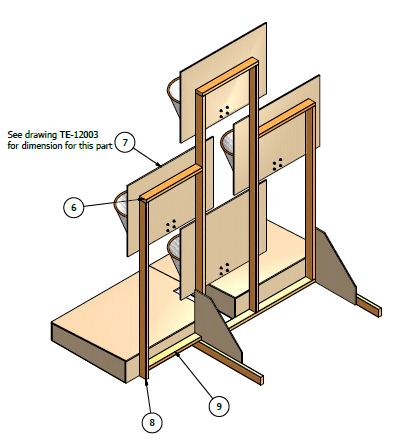
To build a 4 hoop assembly, Build a 3 hoop assembly

then add the 4th hoop. Why not just build a frame for all 4 from the start and decide if you want to add them all?

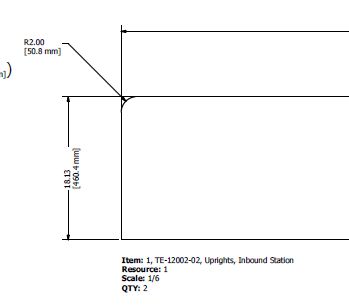
Non-functional fillets, just a waste of time.
This one is TOTALLY on me. I was in a wood cutting frenzy and saw the below drawing and cut 4 pieces 88″ x 4″ out of the half in plywood I was using for almost everything. I just wish I had seen that it was a print for a velcro strip.

Btw if anyone wants some ultra thick velcro stripcs that don’t not stick to anything and resembles plywood, all you have to do is come by and pick them up. No Charge.
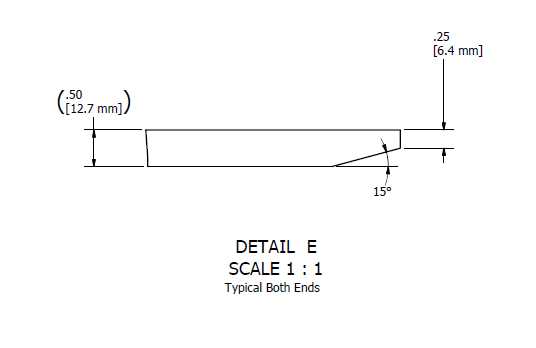
And Finally my favorite, how do you add this feature to the bottom of a piece of plywood?
I understand that this is to make the bridge more flush with the ground, but putting a 1/4 inch 15deg chamfer on a 1/2″ thick piece of board is silly. It is really two parts for me.
1) The only way I could accurately think of doing this is on a shaper, which i don’t believe many teams have and the specific bit would be expensive. You could also stand the part up on end and cut it with a table saw but it would be extremely dangerous (Please Please Please don’t do this!!). If you really want to do this give a freshman a sander and tell them to go at it. A belt sander if you are nice, sand paper if you are not.
2) If your robot needs this to climb the ramp you have more problems then how to make this part, so don’t worry about it anyway.
Some other minor things…
- Control your decimal points. Why show 2 decimals in inches and 1 in metric? Last time I checked .1mm =.0039in so why are you going to display 1/8 as .13 instead of .125″ Either drop the metric decimal or add the 3rd place in inches.
- If you are designing for people to make things out of wood, showing dimensions in fractions is a really nice gesture.
- Please don’t reference drawings not included in the specific package I am looking at. While I understand that sometimes the team field drawings are exactly the same as the real field drawings, it is annoying to try and track down a sheet which is in a different pdf. (ie. The lexan used for the top of the bridge) it doesn’t cost extra to include that sheet where needed.
- It would be awesome if FIRST also provided a spreadsheet BOM for these so it would be really easy to figure out all the fasteners and materials needed as it would make home depot runs easier.
- It would be even more awesome if there were some recommended part nesting layouts on plywood so you could minimize the sheets needed. I feel we did a good job today, but we still ended up with a load of scrap or as I call it the first week of build season “prototype materials”
We didn’t get finished but everything is cut and ready to go for some serious assembly tomorrow. And now for your moment of zen.


And where is the prints for the “Fender?”….add that to your list.
Is your bridge as tippy as the official one as described in the kickoff videos?
Nice write-up ! I agree, an organized BoM of all these parts would be huge !